Sticking bare LED strip lights directly onto painted drywall, wood trim, or timber cabinetry with built-in adhesive backing is one of the most common mistakes in home lighting design. Over time, operational heat causes the tape backing to fail, exposed wires collect dust, and bare LED chips create intense visual glare.
An aluminium LED profile—also known as an LED channel or extrusion—solves these structural and aesthetic problems. By enclosing flexible circuit boards inside a metal housing, profiles transform raw electronic components into durable, integrated architectural light fixtures.
What Are Aluminium LED Profiles and How Do They Work?
An aluminium LED profile is a rigid metal track designed to house, protect, and cool flexible LED light strips. It functions as a complete mounting enclosure that upgrades exposed tape lighting into a solid linear fixture.
A standard profile kit consists of four core components:
- Aluminium Channel (Extrusion): The structural metal base that holds the LED strip straight and absorbs operational heat.
- Diffuser Cover: A snap-in or slide-in plastic lens (clear, frosted, or opal) that protects the diodes and shapes the light output.
- End Caps: Plastic covers fitted at both ends to seal the channel, route power wires cleanly, and prevent dust intrusion.
- Mounting Brackets: Metal or plastic clips secured to the wall or cabinet surface that allow the profile to snap firmly into place.
To assemble the unit, you peel the paper backing off the flexible LED tape, firmly press the strip onto the clean aluminium channel interior, connect your power source wires, and snap the diffuser cover over the top.
Thermal Management and Protection: Extending the Lifespan of LED Strip Lights
Heat is the primary cause of premature LED failure. Although LED strip lights consume minimal power, surface-mounted diode chips generate heat directly on their flexible circuit board. When stuck directly to insulating surfaces like wood or plasterboard, that heat remains trapped around the copper pads and phosphor coating, causing brightness decay and color shifting over time.
Aluminium acts as an exceptional thermal heat sink. When mounted inside an aluminium profile, heat transfers away from the printed circuit board through the extrusion metal, spreading across a larger surface area and dissipating safely into the surrounding air. Proper heat dissipation prevents thermal overload, keeping the LEDs running cool and preserving their rated operational lifespan.
In addition to thermal control, aluminium channels offer essential physical protection. In high-traffic zones like kitchen islands, hallways, or workshops, an open LED tape is easily damaged during routine cleaning or accidental bumps. Enclosing the strip inside a sturdy metal channel behind a protective cover shields the electronics from impact, moisture splashes, and dust build-up.
Smooth Light Diffusion: Say Goodbye to Harsh LED Dots
Exposed LED strips produce harsh, individual points of brightness—often referred to as the “dotting effect” or “hotspots.” When reflected off polished kitchen countertops, stone tiles, or glossy hardwood floors, these individual dots create intense glare that tires the eyes.
Adding a diffuser cover to an aluminium channel smooths out the light distribution. Diffusers come in three primary styles:
- Clear Diffusers: Offer maximum light transmission (up to 95% brightness) while providing physical protection against dust and debris. Ideal when the fixture is hidden inside a cove where the lens is not directly visible.
- Frosted Diffusers: Balance high light transmission with moderate diffusion, softening direct glare while retaining strong output for task lighting.
- Opal/Milky Diffusers: Provide maximum light diffusion (absorbing roughly 15% to 20% of light output) to scatter light evenly. When combined with high-density LED strips, milky diffusers eliminate individual dots entirely, producing a continuous bar of light.
To achieve a completely “dotless” continuous beam, ensure the distance between the LED chip and the diffuser cover is greater than the spacing between individual LEDs on the strip itself.
Matching Profile Types to Your DIY Project: From Kitchens to Stairs
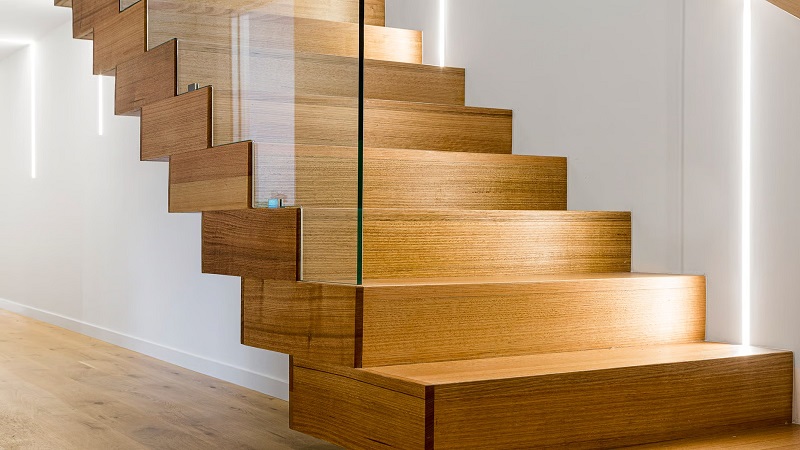
Different residential lighting applications require specific profile shapes to direct light where it is needed most. Choosing the correct extrusion geometry simplifies installation and ensures a flush finish.
Surface Mounting Profiles
Surface-mounted channels are the most straightforward option for DIY enthusiasts. These flat rectangular tracks attach directly onto under cabinet lighting zones, wardrobe interiors, or shelving units using clip-on mounting brackets or countersunk screws. They require no structural cutting or routing.
Recessed Profiles
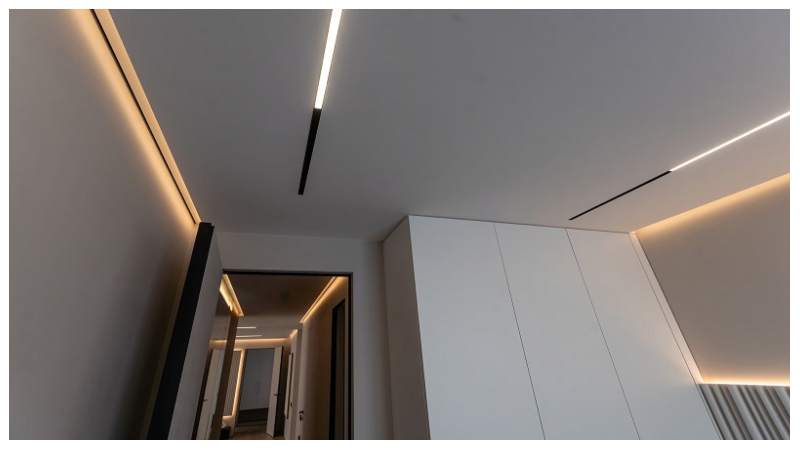
Recessed (or flush-mounted) channels feature side flanges that conceal the raw edges of a routed groove. They sink directly into channels cut into wooden cabinetry, drywall ceilings, or plaster walls, creating a flush, integrated line of light that sits completely smooth with the surrounding surface.
Corner Profiles
Engineered with a 90-degree triangular back, corner profiles fit snugly into the junction between walls and ceiling, or under upper kitchen cabinets. The internal channel is angled at 45 degrees, directing illumination inward across the countertop rather than shining straight down or out into your eyes.
Architectural & Stair Profiles
Specialized profiles cater to structural applications like stair treads, glass shelves, or hanging pendant tracks. Heavy-duty stair profiles feature non-slip rubber treads on top and thick aluminium walls designed to withstand daily foot traffic while illuminating step edges for safety.
When planning custom joinery or kitchen upgrades, sourcing purpose-built extrusions ensures your installation looks seamlessly built-in rather than added on. Choosing high-quality aluminium LED profiles allows you to select exact depths, lens styles, and custom-cut lengths that fit your cabinetry or wall layout without visible gaps.
A Step-by-Step Guide to Planning Your Installation’’
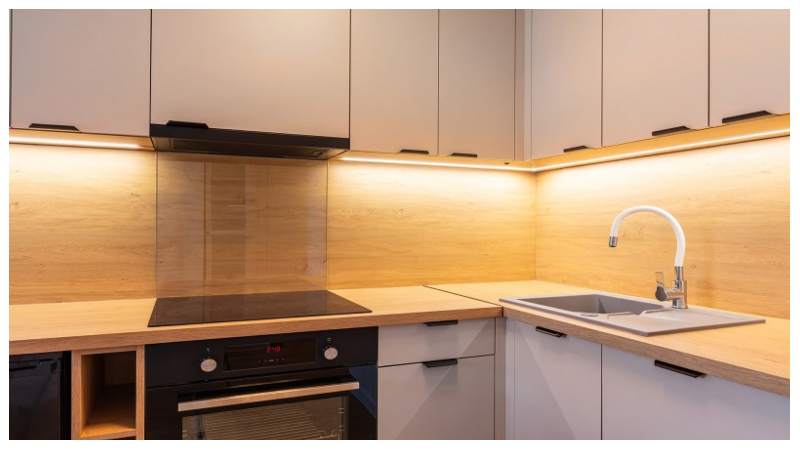
Before you install LED strip lights inside an LED aluminum profile, take time to determine the precise technical requirements of your room. Selecting the right LED strip lights means carefully matching the LED density and available colour options to the type of accent lighting you want to achieve. Product packaging and technical datasheets provide information and detailed information on whether a specific strip is suitable for standard indoor furniture or requires a higher ip rating for humid environments.
1. Measure and Cut the Extrusion
Measure your mounting area accurately before cutting. Cut the metal aluminium channel to size using a fine-toothed hacksaw or a mitre saw with a non-ferrous metal blade. Trim the plastic diffuser cover separately with a hand saw while attached to a scrap piece of channel to prevent the plastic from cracking at the edges.
2. Fit the LED Strip
Clean the inside of the aluminium profile with isopropyl alcohol to remove oil and metal dust. Cut your LED strip to size, strictly adhering to the designated cut lines marked by exposed copper pads. Peel back the adhesive backing tape and firmly press the strip into the center of the metal channel, working from one end to the other to eliminate air pockets.
3. Wire and Connect Power
Pass your low-voltage power supply wires through the pre-drilled rubber grommet on the end cap. Pay close attention to electrical safety standards:
- Total Wattage: Calculate the overall power consumption of your entire strip length (Watts per meter × total meters).
- Safety Margin: Select the best power supply that offers at least a 20% safety margin above your calculated total wattage to prevent power unit overload.
- Voltage Drop: For long LED strip runs (exceeding 5 meters on 12V systems or 10 meters on 24V systems), supply power from both ends or use plug-and-play main power injection to prevent fading brightness toward the end of the line.
4. Mount and Snap Together
Secure the mounting brackets to your ceiling, cabinet, or wall surface using appropriate screws. Snap the assembled aluminium profile into the brackets, fit the end caps snugly onto both sides, and clip the plastic diffuser cover firmly into the top channel.
Final Takeaway: A Clean Finish That Lasts
Upgrading from raw tape to aluminium profiles is the key to achieving a professional, built-in look. Extrusions serve three vital functions: dissipating heat to extend LED lifespan, shielding components from physical damage, and diffusing harsh hotspots. Matching the right profile geometry to your space transforms simple LED strips into a seamless, durable lighting system.
Frequently Asked Questions About Aluminium LED Profiles
Can I cut aluminium LED profiles to fit my exact cabinet dimensions?
Yes, aluminium extrusions and plastic diffusers can easily be cut to any custom length using a standard fine-toothed hacksaw or mitre saw. Remember to trim the flexible LED light strip inside only at its designated copper cut lines to avoid damaging the internal circuit board.
Does using a frosted diffuser cover reduce the brightness of my LED light strip?
A frosted or milky diffuser cover absorbs approximately 10% to 20% of the strip’s total lumen output. However, it eliminates uncomfortable direct glare and hot spots, creating a smooth, diffused illumination that makes the light far more practical and visually pleasing for ambient and task lighting.
Are aluminium LED profiles strictly necessary for low-power LED strips?
While low-power decorative LED strips can technically stick directly to smooth, non-porous surfaces, using an aluminium channel is always recommended. The profile prevents adhesive peeling over time, protects delicate electronic components from moisture and dust, and provides a polished finish.